
The Language of Flowers + Watercolors
- Thinking Of You ♡

- Nov 22, 2020
- 5 min read
Updated: Nov 28, 2020
When it comes to gifts to give your loved ones, there is perhaps nothing easier than giving them a bouquet of flowers. However, bouquets of flowers do not last long. If you want to give a gift that is both stunning, holds special meaning and lasts forever, you’ll want to create some watercolor flower designs that you can gift away. These designs can be painted on some thick pieces of watercolor paper, on a canvas or on cardstock paper. You can then frame them before giving them away or give them away like an ordinary card. Below, you can find various watercolor flowers to paint and in today’s post, also learn the meaning behind each of the flowers.
Before reading the instructions, it is important for you to know that the flower meanings are derived from the language of flowers. In the Victorian Era, people used to gift each other flowers to conceal messages behind them. It was up to the receiver to understand these messages. The meaning of the flowers that are listed below are inspired by both modern influences, the original language of flower meanings and color psychology. Without further ado – let’s start crafting!
1. The Rose
This is perhaps the most romantic flower of them all. Today, roses are associated heavily with romance and Valentine’s day. But do you know the history behind the rose? In western culture, the significance of the rose dates back to Greek mythology. It was believed that this special flower was created by Aphrodite, the goddess of love. Appropriately, in ancient times, the wealthy would fill their bedrooms with bouquets of roses to provide a pleasant smell and ambiance for their romantic encounters. Virtually all cultures associate roses with romance, which is a legacy that endures to this day. Paired with the color red, roses also symbolize passion and desire. This is because in color psychology, it is found that red provokes the strongest emotion of any color.
How to Paint Roses in Watercolor
Step 1: Building the colors and painting down the petals
The first step of any painting is always setting down the base color. In this case, we need to set down a vibrant shade of red. Using a regular, pointy brush create the petals of your rose and gradually build up the shape petal by petal. In this case, I start from the side, build up the top and gradually paint in the bottom on the rose.


Step 2: Paint the stem and leaves
After you’ve put the petals down, you now need to start building the leaves. I’ve prepared a nice sap green color for the leaves. With a smaller pointed brush, I take a bit of the pigment and create the twisty shape of the stem and bit by bit, create the outline of the leaves.
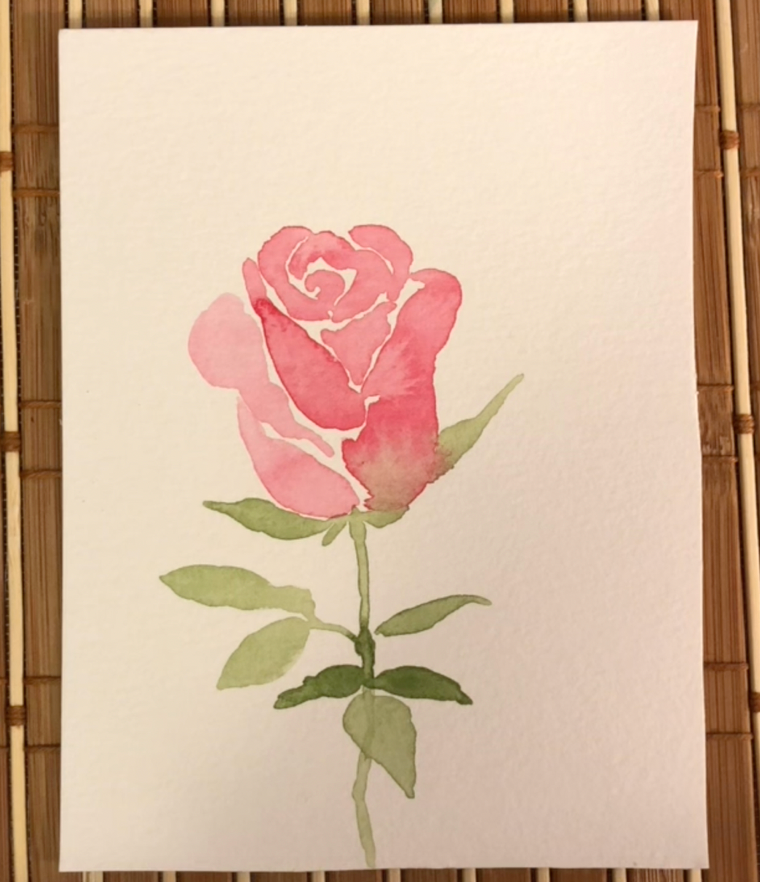
Step 3: Fill in the outlines
Now that you have the base coat down. All you need to do is create the outline of your rose in a darker red hue. Now would also be a good time to add in dark green colors for the leaves and stem on your rose. Make sure that you take breaks at this stage because you want to make sure that the paint properly dries before piling up more layers.


Check out our video of Lillian taking you through how to paint a rose!
2. Sunflower
Nothing is as bright and cheery as a sunflower. This flower is named after the sun, which is why the sunflower is associated with words such as vitality, happiness and warmth. There are various influential figures that have written about the sunflower in an encouraging tone of voice such as Helen Keller and Jean Paul. Their written word praising the sunflower is as follows: “Keep your face to the sunshine and you cannot see the shadows. It’s what the sunflowers do,” and “Every friend is to the other a sun, and a sunflower also. He attracts and follows.” Paired with yellow, the sunflower becomes an attention-grabbing flower. Yellow is a color that is even more visible than red. Therefore, this would be the perfect flower to give someone who has recently accomplished their goals or whom you wish to receive bountiful happiness and success.
How to Paint Sunflowers in Watercolor
Step 1: Prepare the colors
Make sure that you set aside vibrant yellow, sap greens, yellow ochre, light orange and dark brown paint. After you have prepared these colors, we want to make sure that all the lightest shades go down on our painting first. In this case, we want to flesh out the yellow petals for the sunflower, outline of the sap green leaves and stems.

Step 2: Build in some shadows
Using some of the orange and dark green we want to create some of the highlights for the flowers. We are going to do this by outlining each and every flower petal (at the bottom of the petals, at the top, within and around). We’re also going to use the green to highlight areas around the leaves to create the little veins in them.

Step 3: Refine the shadows
Once you are satisfied with how you outlined all your flowers, we are going to do some finishing touches. This means dotting the inside of the sunflower with dark brown and black paint. Also, we want to make sure to darken any areas such as the edges of leaves with colors.

3. Daisy
If you think that daisies look fresh, you’re not the only one. This flower is used to represent innocence and purity across cultures. In Old English, daisies were referred to as the “day’s eye” because at night the petals closed over the yellow center and during the day they reopened. This is where the phrase “fresh as a daisy” comes from. Paired with a white, daisies take on the additional meaning of cleanliness and safety as white is also the color of hospitals, sterility and angels. Therefore, if you have a loved one that you hope will get better soon, the daisy would be the perfect flower to gift them.
How to paint Daisies in Watercolor
Step 1: Painting with minimalism
Since daisies are not very colorful flowers, there is no need to use many colors when painting them. All you need to start is some black, yellow, blue and green paint. We’re only going to be very minimally using the black to create the outlines of the daisy. We need to do this step because daisies are all white, and we can’t paint with white. Therefore, we need to suggest the presence of petals by using black paint. Make sure that you dilute the black though so that the brushstrokes are as dull as possible.


Step 2: Adding in some other colors
Once you’ve got the petals down, it’s time to add the stem and the daisy’s eyes. We do this by taking a diluted green and yellow color. Remember, in the preliminary phase of painting we always want to start out light and then go darker as we add more details. Make sure to let the paint dry before attempting to add more colors. If you do not, all the colors will get muddy.

Step 3: Finishing Touches
Like with all the other flowers that were outlined in this post, the finishing touches of your flower should be putting down the darkest bits of color to ensure that any part of your flower that you would like to stand out, stands out. In this case, I’m going to go ahead and highlight the pointy edges of the daisy, some parts of the stem and also lighten some areas of the flower petals by using some white paint.


Check out our video of Lillian taking you through how to paint a daisy!


Comments